Github README Generator
Pass in the Repo Owner, and Repo Name for a github repo (i.e. "RugburnDev","Snow-Surfer"), and this notebook will return a README summary file, properly formatted in Markdown
Project Setup
OpenAI setup
You will need to make an OpenAI Platform account, Generate an API Key, fund the account ($5 minimum).
Create a .env file in the root of this project and add you openAI API key as follows:
OPENAI_API_KEY=sk-proj-...
Github setup
Next, login to Github and create a Personal Access Token. You will need to set up your token with appropriate 'Read' rights if you are working with private repositories.
Open your .env file and add:
GITHUB_API_KEY=...
# installs
!pip install PyGithub
!pip install openai
!pip install dotenv
!pip install requests
Requirement already satisfied: PyGithub in /opt/anaconda3/envs/llms/lib/python3.11/site-packages (2.7.0)
Requirement already satisfied: pynacl>=1.4.0 in /opt/anaconda3/envs/llms/lib/python3.11/site-packages (from PyGithub) (1.5.0)
Requirement already satisfied: requests>=2.14.0 in /opt/anaconda3/envs/llms/lib/python3.11/site-packages (from PyGithub) (2.32.5)
Requirement already satisfied: pyjwt>=2.4.0 in /opt/anaconda3/envs/llms/lib/python3.11/site-packages (from pyjwt[crypto]>=2.4.0->PyGithub) (2.10.1)
Requirement already satisfied: typing-extensions>=4.5.0 in /opt/anaconda3/envs/llms/lib/python3.11/site-packages (from PyGithub) (4.14.1)
Requirement already satisfied: urllib3>=1.26.0 in /opt/anaconda3/envs/llms/lib/python3.11/site-packages (from PyGithub) (2.5.0)
Requirement already satisfied: cryptography>=3.4.0 in /opt/anaconda3/envs/llms/lib/python3.11/site-packages (from pyjwt[crypto]>=2.4.0->PyGithub) (45.0.6)
Requirement already satisfied: cffi>=1.14 in /opt/anaconda3/envs/llms/lib/python3.11/site-packages (from cryptography>=3.4.0->pyjwt[crypto]>=2.4.0->PyGithub) (1.17.1)
Requirement already satisfied: pycparser in /opt/anaconda3/envs/llms/lib/python3.11/site-packages (from cffi>=1.14->cryptography>=3.4.0->pyjwt[crypto]>=2.4.0->PyGithub) (2.22)
Requirement already satisfied: charset_normalizer<4,>=2 in /opt/anaconda3/envs/llms/lib/python3.11/site-packages (from requests>=2.14.0->PyGithub) (3.4.3)
Requirement already satisfied: idna<4,>=2.5 in /opt/anaconda3/envs/llms/lib/python3.11/site-packages (from requests>=2.14.0->PyGithub) (3.10)
Requirement already satisfied: certifi>=2017.4.17 in /opt/anaconda3/envs/llms/lib/python3.11/site-packages (from requests>=2.14.0->PyGithub) (2025.8.3)
Requirement already satisfied: openai in /opt/anaconda3/envs/llms/lib/python3.11/site-packages (1.101.0)
Requirement already satisfied: anyio<5,>=3.5.0 in /opt/anaconda3/envs/llms/lib/python3.11/site-packages (from openai) (4.10.0)
Requirement already satisfied: distro<2,>=1.7.0 in /opt/anaconda3/envs/llms/lib/python3.11/site-packages (from openai) (1.9.0)
Requirement already satisfied: httpx<1,>=0.23.0 in /opt/anaconda3/envs/llms/lib/python3.11/site-packages (from openai) (0.28.1)
Requirement already satisfied: jiter<1,>=0.4.0 in /opt/anaconda3/envs/llms/lib/python3.11/site-packages (from openai) (0.10.0)
Requirement already satisfied: pydantic<3,>=1.9.0 in /opt/anaconda3/envs/llms/lib/python3.11/site-packages (from openai) (2.11.7)
Requirement already satisfied: sniffio in /opt/anaconda3/envs/llms/lib/python3.11/site-packages (from openai) (1.3.1)
Requirement already satisfied: tqdm>4 in /opt/anaconda3/envs/llms/lib/python3.11/site-packages (from openai) (4.67.1)
Requirement already satisfied: typing-extensions<5,>=4.11 in /opt/anaconda3/envs/llms/lib/python3.11/site-packages (from openai) (4.14.1)
Requirement already satisfied: idna>=2.8 in /opt/anaconda3/envs/llms/lib/python3.11/site-packages (from anyio<5,>=3.5.0->openai) (3.10)
Requirement already satisfied: certifi in /opt/anaconda3/envs/llms/lib/python3.11/site-packages (from httpx<1,>=0.23.0->openai) (2025.8.3)
Requirement already satisfied: httpcore==1.* in /opt/anaconda3/envs/llms/lib/python3.11/site-packages (from httpx<1,>=0.23.0->openai) (1.0.9)
Requirement already satisfied: h11>=0.16 in /opt/anaconda3/envs/llms/lib/python3.11/site-packages (from httpcore==1.*->httpx<1,>=0.23.0->openai) (0.16.0)
Requirement already satisfied: annotated-types>=0.6.0 in /opt/anaconda3/envs/llms/lib/python3.11/site-packages (from pydantic<3,>=1.9.0->openai) (0.7.0)
Requirement already satisfied: pydantic-core==2.33.2 in /opt/anaconda3/envs/llms/lib/python3.11/site-packages (from pydantic<3,>=1.9.0->openai) (2.33.2)
Requirement already satisfied: typing-inspection>=0.4.0 in /opt/anaconda3/envs/llms/lib/python3.11/site-packages (from pydantic<3,>=1.9.0->openai) (0.4.1)
Requirement already satisfied: dotenv in /opt/anaconda3/envs/llms/lib/python3.11/site-packages (0.9.9)
Requirement already satisfied: python-dotenv in /opt/anaconda3/envs/llms/lib/python3.11/site-packages (from dotenv) (1.1.1)
Requirement already satisfied: requests in /opt/anaconda3/envs/llms/lib/python3.11/site-packages (2.32.5)
Requirement already satisfied: charset_normalizer<4,>=2 in /opt/anaconda3/envs/llms/lib/python3.11/site-packages (from requests) (3.4.3)
Requirement already satisfied: idna<4,>=2.5 in /opt/anaconda3/envs/llms/lib/python3.11/site-packages (from requests) (3.10)
Requirement already satisfied: urllib3<3,>=1.21.1 in /opt/anaconda3/envs/llms/lib/python3.11/site-packages (from requests) (2.5.0)
Requirement already satisfied: certifi>=2017.4.17 in /opt/anaconda3/envs/llms/lib/python3.11/site-packages (from requests) (2025.8.3)
# Imports
import os
import requests
import json
import warnings

from dotenv import load_dotenv
from IPython.display import Markdown, display, update_display
from openai import OpenAI
from github import Github
# constants
MODEL_GPT = 'gpt-4o-mini'
MAX_CHARACTERS = 40_000 # ~10,000 Tokens
DEBUG = False # set True on if you want the testing/debug blocks to run. True will slow down execution running and printing otherwise unused code.
# set up environment
load_dotenv(override=True)
api_key = os.getenv('OPENAI_API_KEY')
github_api_key = os.getenv('GITHUB_API_KEY') # you will need this (setup with 'read' rights if your repository is private)

if api_key and api_key.startswith('sk-proj-') and len(api_key)>10:
    print("OpenAI API key looks good so far")
else:
    print("There might be a problem with your OpenAI API key?")

if github_api_key and github_api_key.startswith('ghp_') and len(github_api_key)>10:
    print("Github API key looks good so far")
else:
    print("There might be a problem with your Github API key?")

openai = OpenAI()
g = Github(github_api_key)
OpenAI API key looks good so far
Github API key looks good so far
Get files from Github
We use PyGithub to pull in all our files for later analysis.
def get_repo(repo_owner:str, repo_name:str):
    try:
        repo = g.get_user(repo_owner).get_repo(repo_name)
        return repo
    except:
        warn_message = f"\nUnable to resolve {repo_owner}/{repo_name}. Please double check your inputs and try again."
        warnings.warn(warn_message, category=UserWarning)
        return None
def get_all_repo_files(repo_owner:str, repo_name:str) -> list:
    repo = get_repo(repo_owner, repo_name)
    if not repo:
        return None

    # Get the contents of the root directory
    contents = repo.get_contents("")

    # Recursively iterate through contents to get all files
    all_files = []
    while contents:
        file_content = contents.pop(0)
        if file_content.type == "dir":
            contents.extend(repo.get_contents(file_content.path))
        else:
            all_files.append(file_content.path)

    return all_files
# test this function
if DEBUG:
    all_repo_files = get_all_repo_files("rugburndev", "snow-surfer")

    # print first 10 files to check
    if all_repo_files:
        for file_path in all_repo_files[:10]:
            print(f"{file_path}")
        print("...")
    else:
        print("Repo not found!")
get_files_system_prompt = """You are provided with a list of files found in a github repository.
You are to decide which of the files would be most relevant to read for context to build a README file for the repository.
Useful folders would include Scripts, Resources, Scenes, and Prefab. The README file should describe what the project is, and what programing skills this project would exemplify.
Ignore audio and image files, and any other files that won't be utf-8 decodeable.
You should respond in JSON, with the pages organized by which are primarily important, and which are secondarily important as in this example:
{
    "primary": [
        "filename1",
        "filename2"
    ]
    "secondary": [
        "filename1",
        "filename2"
    ]
}

"""

# Check prompt
if DEBUG:
    print(get_files_system_prompt)
def truncate(user_prompt:str) -> str:
    # Truncate prompt if more than MAX_CHARACTERS
    if len(user_prompt) > MAX_CHARACTERS:
        warn_message = f"\nuser_prompt is {len(user_prompt)} characters...Prompt was truncated to MAX_CHARACTERS setting of {MAX_CHARACTERS} characters."
        warnings.warn(warn_message, category=UserWarning)
        user_prompt = user_prompt[:MAX_CHARACTERS]

    return user_prompt
def get_relevant_files_user_prompt(repo_owner:str, repo_name:str) -> str:
    user_prompt = f"""Here is the list of files in the Github Repo of {repo_name}, owned by {repo_owner} -
    Please decide which of these files are relevant to determine what this project does, so we can build an appropriate Github project README file.
    Respond with the full filename in JSON format.
    Files:\n"""
    user_prompt += "\n".join(get_all_repo_files(repo_owner, repo_name))

    # truncate if necessary
    user_prompt = truncate(user_prompt)

    return user_prompt
if DEBUG:
    # check prompt
    print(get_relevant_files_user_prompt("rugburndev", "snow-surfer"))
def get_useful_files(repo_owner:str, repo_name:str):
    response = openai.chat.completions.create(
        model=MODEL_GPT,
        messages=[
            {"role": "system", "content": get_files_system_prompt},
            {"role": "user", "content": get_relevant_files_user_prompt(repo_owner, repo_name)}
      ],
        response_format={"type": "json_object"}
    )
    result_json = json.loads(response.choices[0].message.content)

    return result_json
if DEBUG:
    # check prompt
    test = get_useful_files("rugburndev", "snow-surfer")
    print(test)
Build README using designated Files
Using the response from our prompt built above, now use a GPT call to build the README file, in Markdown format.
def get_file_content_from_list(repo_owner:str, repo_name:str, file_list:list) -> str:
    repo = get_repo(repo_owner, repo_name)
    if not repo:
        return None

    result = ""

    for file_name in file_list:
        if DEBUG:
            print(f"Getting Content for: {file_name}")
        try:
            file_content = repo.get_contents(file_name)
            decoded_file_content = file_content.decoded_content.decode('utf-8')

            result += f"File name: {file_content.name}\n"
            result += f"File content:\n{decoded_file_content}\n\n"
        except:
            warn_message = f"\nUnable to decode: {file_content.name}! Skipping this file."
            warnings.warn(warn_message, category=UserWarning)

    return result
def get_all_relevant_file_content(repo_owner:str, repo_name:str) -> str:
    if DEBUG:
        # avoid needlessly hitting OpenAI API
        relevant_files = test
    else:
        relevant_files = get_useful_files(repo_owner, repo_name)

    result = ""

    # run primary first so less important info will be at end of prompt for truncation purposes
    if relevant_files:
        if "primary" in relevant_files.keys():
            result = get_file_content_from_list(repo_owner, repo_name, relevant_files["primary"])
        if "secondary" in relevant_files.keys():
            result += get_file_content_from_list(repo_owner, repo_name, relevant_files["secondary"])
    else:
        warn_message = f"\nNO RELEVANT FILES FOUND!"
        warnings.warn(warn_message, category=UserWarning)

    return result
if DEBUG:
    print(get_all_relevant_file_content("rugburndev", "snow-surfer"))
readme_system_prompt = "You are an assistant that analyzes the contents of several relevant files from a Github repository \
and creates a README file. The README file should describe what the project is, and what programing skills this project would exemplify. \
Respond in markdown."
print(readme_system_prompt)
You are an assistant that analyzes the contents of several relevant files from a Github repository and creates a README file. The README file should describe what the project is, and what programing skills this project would exemplify. Respond in markdown.
def get_readme_user_prompt(repo_owner:str, repo_name:str) -> str:
    user_prompt = f"You are looking at a Github repository named: {repo_name}\n"
    user_prompt += f"Here are the contents of its important files; use this information to build a README file for the project in markdown.\n"
    user_prompt += get_all_relevant_file_content(repo_owner, repo_name)

    # truncate if necessary
    user_prompt = truncate(user_prompt)

    return user_prompt
if DEBUG:
    readme_user_prompt = get_readme_user_prompt("rugburndev", "snow-surfer")
    print("\n", readme_user_prompt)
def create_README(repo_owner:str, repo_name:str):
    response = openai.chat.completions.create(
        model=MODEL_GPT,
        messages=[
            {"role": "system", "content": readme_system_prompt},
            {"role": "user", "content": get_readme_user_prompt(repo_owner, repo_name)}
          ],
    )
    result = response.choices[0].message.content

    if not os.path.exists(repo_name):
        os.makedirs(repo_name)

    with open(f"{repo_name}/README.md", 'w', encoding='utf-8') as f:
        f.write(result)

    display(Markdown(result))
def create_all_README(repo_owner:str, only_new:bool=False):
    user = g.get_user(repo_owner)
    repos = user.get_repos()

    for repo in repos:
        if only_new and os.path.exists(repo.name):
                pass
        else:
            print(f"Creating README for: {repo.name}")
            create_README(repo_owner, repo.name)
create_all_README("RugBurnDev", only_new=True)
Creating README for: AngryAnimals
Angry Animals
Overview
Angry Animals is a mobile game project that embodies a playful interaction with the user, allowing them to control various characters (animals) with the goal of achieving high scores across multiple levels. Players are tasked with launching their animals at targets (cups) to score points, akin to classic slingshot-style gameplay.
The game is designed using the Godot Engine, making use of its robust scene system, scripting capabilities, and handling of 2D physics. The project is structured with an emphasis on modularity and resource management, enhancing both maintainability and scalability.
Key Features
- Intuitive Gameplay: Players drag and release their characters to interact with various in-game objects.
- Level-Based Scoring: Players can track their best scores for each level, fostering competitive gameplay.
- Signal System: An event-driven architecture ensures efficient communication between game objects.
- Visual and Audio Feedback: The game includes animations and sound effects to enhance player experience.
Project Structure
Main Scene (
main.tscn):- The entry point of the game where players can select levels.
Level Scenes (
level_1.tscn,level_2.tscn, etc.):- Individual level setups that contain specific arrangements of targets and configurations for each challenge.
Game Logic Scripts:
ScoreManager.gd: Manages score persistence and retrieval for levels.SignalHub.gd: Central communication hub to emit and handle game events for various interactions (e.g., bird died, cup destroyed).bird.gd: Implements the mechanics for the player-controlled animals including dragging and releasing.cup.gd: Defines target entities that get destroyed upon collision with the bird.
UI Scripts:
game_ui.gd: Handles user interface updates, such as displaying attempts and managing game over scenarios.
Programming Skills Exemplified
This project showcases a variety of essential programming skills:
- Object-Oriented Programming: The use of classes and inheritance in GDScript demonstrates fundamental OOP principles.
- Event-Driven Programming: Implementing signals for inter-object communication highlights an understanding of decoupled applications.
- Data Management: Using dictionaries for score tracking and resource loading shows data handling skills.
- Game Logic Implementation: Understanding of physics, input handling, and game state management in a 2D space demonstrates game development expertise.
- UI Development: Creating dynamic user interfaces that respond to game events and user actions reflects good practices in frontend development for games.
Getting Started
To play Angry Animals, you will need the Godot Engine. To clone and run the project:
git clone https://github.com/yourusername/AngryAnimals.git
cd AngryAnimals
godot main.tscn
Make sure to have the required assets in place, as referenced in the .tscn files.
Feel free to contribute to Angry Animals by submitting issues, pull requests, or suggestions for new features. Happy gaming!
Creating README for: BlenderModels
BlenderModels
Welcome to the BlenderModels repository! This project hosts a diverse collection of 3D models created using Blender, a popular open-source 3D modeling software. The models can be utilized for various projects, including game development, animation, architectural visualization, and more.
Features
- A variety of 3D models created in Blender.
- Models available for educational and non-commercial use under the Creative Commons Attribution-NonCommercial-ShareAlike 4.0 International License.
- Ideal for developers, artists, and hobbyists looking for 3D assets to enhance their projects.
License
This project is licensed under the Creative Commons Attribution-NonCommercial-ShareAlike 4.0 International License. You are free to share and adapt the models for non-commercial purposes, provided you give appropriate credit, link to the license, and indicate if changes were made.
Skills Exemplified
This project exemplifies a variety of programming and technical skills, including:
- 3D Modeling: Proficiency in Blender for creating 3D assets.
- File Management: Understanding of organizing and managing digital 3D files systematically.
- Licensing Knowledge: Awareness of intellectual property rights and licenses applicable to digital assets.
Whether you are a seasoned Blender user or a beginner interested in exploring 3D modeling, this repository offers valuable resources to kickstart your creative projects. Happy modeling!
Creating README for: Delivery-Dash
/var/folders/w8/vvd6_5257db0q26brk71hkh00000gn/T/ipykernel_59970/307256082.py:19: UserWarning:
Unable to decode: game.unity! Skipping this file.
  warnings.warn(warn_message, category=UserWarning)
/var/folders/w8/vvd6_5257db0q26brk71hkh00000gn/T/ipykernel_59970/119643033.py:5: UserWarning:
user_prompt is 430685 characters...Prompt was truncated to MAX_CHARACTERS setting of 40000 characters.
  warnings.warn(warn_message, category=UserWarning)
Delivery-Dash
Welcome to Delivery-Dash, a fast-paced delivery game where players navigate through a lively environment, collecting and delivering packages while competing against time. The game incorporates engaging elements of strategy, excitement, and skills in a vibrant and interactive world, powered by Unity.
Project Overview
The Delivery-Dash project consists of several essential components that work together to create an immersive gaming experience. The core features are implemented in C#, utilizing the Unity game engine. Here are some of the key components:
GameManager.cs: This script manages the overall game state, keeping track of the packages delivered, spawning new packages and boosts, handling game over conditions, and displaying relevant UI elements such as scores and timer.
GameTimer.cs: This class manages countdown timers for different game states (e.g., searching for packages, delivering them), updating the UI with the remaining time, and triggering end-of-timer events.
Constants.cs: Contains a collection of constants used throughout the project, such as tags for various game objects, maximum allowed packages and boosts, and scene names.
Utils.cs: A utility class providing helpful static methods, such as logging messages for debugging.
Car.prefab: A Unity prefab file that defines the car object within the game, including its components and properties.
Skills Demonstrated
This project showcases a variety of programming skills and concepts, including:
Object-Oriented Programming: Implementation of classes and interfaces, using inheritance, encapsulation, and polymorphism.
Game Development with Unity: Proficient use of Unity's ecosystem for creating game objects, handling physics, implementing collision detection, and managing game states.
C# Scripting: Writing C# scripts to control game logic, manage interactions, and handle user input.
Event Management: Utilizing events and method callbacks to maintain responsiveness in the game, such as triggering actions when timers expire.
User Interface Design: Creating and managing dynamic user interfaces using Unity’s UI toolkit, including text updates, button interactions, and animations.
Debugging Techniques: Applying effective debugging practices, such as logging messages to track game state changes and user interactions.
Getting Started
To get a local copy of this project, follow these steps:
Clone the Repository:
git clone https://github.com/yourusername/Delivery-Dash.git
Open in Unity:
Open the project folder in Unity Hub to load the game.Play the Game:
Once the project is loaded, you can run it in the Unity editor.
Contributing
Contributions are welcome! If you have suggestions for improvements or want to fix a bug, please feel free to create a pull request or open an issue.
License
This project is open-source and available under the MIT License. See LICENSE for more information.
Happy Delivering!
Creating README for: Don-tMindMe
/var/folders/w8/vvd6_5257db0q26brk71hkh00000gn/T/ipykernel_59970/119643033.py:5: UserWarning:
user_prompt is 57325 characters...Prompt was truncated to MAX_CHARACTERS setting of 40000 characters.
  warnings.warn(warn_message, category=UserWarning)
Don't Mind Me
Overview
"Don't Mind Me" is a 2D action-adventure game developed in Godot. Players will traverse through various levels, collecting items, avoiding NPC enemies, and ultimately trying to reach the exit. With an engaging gameplay loop, this project demonstrates key components of game development including level design, player input handling, collision detection, character movement, and event-driven programming using signals.
Features
- Scene Management: The game features multiple scenes including main menus, level layouts, and game over screens.
- Player Interactions: Players can move, collect items, avoid enemies, and eventually reach the exit.
- NPC Behavior: Non-player characters can patrol, chase the player, and react to player inputs, showcasing AI features.
- Signal System: Uses a signal hub for event-driven programming, handling events such as item collection, player death, and game victory.
- Dynamic UI: User interface elements that display scores, game status, and respond to player actions.
Skills Exemplified
This project exemplifies a variety of programming skills necessary for game development:
- GDScript Proficiency: Coding game logic using GDScript, including classes, signals, variables, and functions.
- Scene Management: Efficiently managing different game scenes and transitions.
- Event-driven Programming: Utilizing the signaling mechanism in Godot for asynchronous event handling.
- Environmental Interactions: Implementing collision detection and interaction logic with objects and NPCs.
- Game Design Principles: Basic understanding of game mechanics, level design, and user experience considerations.
Feel free to explore the code, contribute, and modify as needed!
Acknowledgements
A special thanks to Richard Allbert for the foundational knowledge in 2D game development using Godot.
Creating README for: EggMan
EggMan
EggMan is a fast-paced, retro-style arcade game where you play as a pixelated egg with an insatiable appetite. Dash left and right to catch falling eggs before they crack — the more you catch, the higher your score. Miss too many, and it’s game over. Simple to play, hard to put down.
Features
- Catch Mechanic: The player controls a character that catches falling eggs.
- Leaderboard Implementation: High scores are tracked and displayed after each game session.
- Health System: A health bar that depletes when missing eggs.
- Dynamic Gameplay: Variable egg drop speeds and gameplay mechanics based on player actions.
- Responsive UI: Interactive UI elements that reflect the game state.
Technologies Used
This project is implemented using Godot Engine with the following programming skills exemplified:
- GDScript Programming: The primary language for scripting game logic, including player controls, score tracking, and game state management.
- Resource Management: Handling custom resources for managing high scores and various game objects.
- Signal System: Utilizing Godot’s built-in signal system to manage communication between game objects, such as events when an egg is caught or a player dies.
- Scene Management: Creating and managing multiple scenes (Levels, Menus, UI components) and transitioning between them based on player actions.
- Game Physics: Implementing physics interactions for player movements and collisions with egg objects.
- UI Design: Crafting intuitive user interfaces using Control nodes, including health bars and leaderboard displays.
Getting Started
To get started with EggMan, clone the repository and open it in Godot Engine. Ensure you have the required assets linked properly and enjoy playing!
Installation
- Clone the repository.
git clone https://github.com/yourusername/EggMan.git
- Open the project in Godot Engine.
- Run the main scene to start playing.
Controls
- Move Left:
Aor left arrow key - Move Right:
Dor right arrow key - Catch Egg:
Wor space bar - Pause Game:
P - Quit Game: Esc key (when game over)
Contribution
Contributions are welcome! Please feel free to submit a pull request or open an issue if you find a bug or have suggestions for improvements.
Enjoy playing EggMan and happy catching!
Creating README for: GemCatcher
Gem Catcher
Overview
Gem Catcher is a 2D mobile game built using the Godot game engine. In this game, players control a paddle to catch falling gems while avoiding obstacles. The game features an engaging user interface, various sound effects, and a timer system that challenges players to score as much as they can within a limited time.
Key Features
- Responsive Controls: Players can move the paddle left or right using keyboard inputs, allowing for precise control.
- Dynamic Gameplay: Gems fall from the top, and the game increases in difficulty as players progress.
- Sound Effects and Background Music: Enjoy immersive audio as players catch gems and navigate challenges.
- Scoring System: A scoreboard displays the player's score, adding competitive elements to the gameplay.
Development Skills Exemplified
This project demonstrates a variety of programming skills relevant to game development, including:
- Scene Management: Understanding of Godot's scene system as evidenced by the organization of game elements into separate scenes (e.g., Game, Paddle, Gem).
- Scripting in GDScript: Use of GDScript for handling game logic, including interactions, scoring, and game state management.
- Input Handling: Monitoring and responding to user inputs through detailed configuration settings for keyboard actions.
- Physics and Collision Handling: Implementation of
Area2Dnodes for detecting collisions between the paddle and gems, showcasing knowledge of Godot’s physics engine. - Timer and Sound Integration: Utilization of the Timer node to manage gameplay timing and AudioStreamPlayer nodes for sound effects and background music.
- Exporting for Web: Configuration of export settings for deploying the game to web platforms.
Additional Information
Acknowledgements
This project was built using insights gained from the course: Jumpstart to 2D Game Development: Godot 4.4+ for Beginners - Richard Allbert.
Feel free to explore the source code, contribute, or play Gem Catcher directly through its exported versions!
Getting Started
To run the project locally or for development purposes, you will need:
- Godot Engine: Visit the official Godot website to download the appropriate version (4.4 or later is recommended).
- Clone the Repository: Use
git cloneto fetch the project files. - Open the Project: Launch the Godot Engine and open the project directory.
With these steps, you can test and modify Gem Catcher according to your preferences. Happy coding!
Creating README for: MemoryMadness
MemoryMadness
MemoryMadness is an engaging memory matching game developed using Godot Engine. The project features dynamically loaded game levels, image assets, and utilizes a variety of programming patterns, making it a robust example for game development.
Overview
The game is designed to test players' memory by matching pairs of images. As players select tiles, the game tracks the number of moves, game time, and handles game logic, including turns and matches. Various levels with unique configurations enhance the gameplay experience, enabling players to increase difficulty as they progress.
Key Functionalities:
- Dynamic Level Loading: Levels are defined in a resource format that allows the game to preload level data and settings.
- Image Management: The project allows for easy addition and management of image files used in the game, showcasing efficient resource handling.
- Game Logic: Implements key game mechanics, including move counting, match checking, and game-over conditions.
- Responsive UI: The gameplay UI is built with flexibility, enabling easy transitions between game states (main menu, active game, and game over).
- Signals and Slots: Utilizes Godot's signal system for communication between different components, such as game states and UI interactions.
Code Structure
The project is organized into several scripts that serve different purposes:
Resources:
ImageFileListResource.gd: Manages a list of image filenames for dynamic loading.LevelSettingResource.gdandLevelsDataResource.gd: Define level configurations and settings.
Core Game Logic:
Game.gd: Main game logic handling interactions, including tile selection and checking for matches.SignalHub.gd: Centralizes the game's signals for better management of events.GameTile.gd: Represents the individual tiles within the game, handling animations and game state changes.
User Interface:
Master.gd,GameOverUI.gd, andLevelButton.gd: Control the flow of the game UI for starting the game, displaying scores, and handling navigation.
Skills Exemplified
This project showcases several crucial programming skills, including:
- GDScript Proficiency: Demonstrating knowledge of GDScript, Godot's scripting language for game development.
- Object-Oriented Design: Utilizing classes and resources to create modular and reusable code.
- Event-Driven Programming: Efficiently employing Godot's signal and slot system to manage events across different game states and components.
- Game Design Principles: Implementing gameplay mechanics, user experience considerations, and level design strategies.
- File Management: Understanding resource loading and handling in a game environment, allowing for scalability as more assets and levels are added.
Getting Started
To get started with MemoryMadness, clone the repository and open the project in Godot Engine. You can play the game, explore its features, and even modify or expand upon the base functionalities as needed.
Contribution
Contributions to MemoryMadness are welcome! Whether you have suggestions for additional features, bug fixes, or optimizations, feel free to submit a pull request or open an issue.
This README provides a comprehensive look into the MemoryMadness project, from functionality to skills exemplified, offering both current and prospective developers insight into the game's structure and design philosophy.
Creating README for: Sokoban
/var/folders/w8/vvd6_5257db0q26brk71hkh00000gn/T/ipykernel_59970/119643033.py:5: UserWarning:
user_prompt is 129190 characters...Prompt was truncated to MAX_CHARACTERS setting of 40000 characters.
  warnings.warn(warn_message, category=UserWarning)
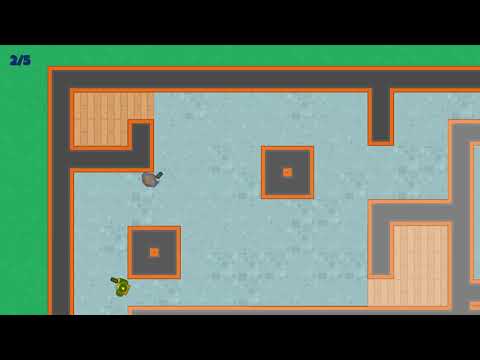
Sokoban Game
Overview
Sokoban is a classic puzzle game where the player pushes boxes onto designated target spaces within a bounded area. The goal is to move all the boxes to their target locations while minimizing the number of moves. The project implements key gameplay mechanics, level design, and score management tailored for an engaging user experience.
Features
- Multiple Levels: The game includes various levels with increasing difficulty, each designed with specific layouts of floors, walls, boxes, and targets.
- High Score Tracking: Players can save their scores and track their progress across different levels.
- Dynamic Level Layouts: Each level's configuration, including the placements of walls, boxes, targets, and the starting position of the player, is defined via a JSON file, allowing for easy updates and new level designs without modifying the codebase.
Technical Details
The Sokoban game is developed using the Godot Engine, leveraging GDScript for scripting various game components. Key scripts include:
HighScoresResource.gd: Manages player score data, saving and retrieving the best scores for levels. It employs a dictionary structure to hold scores against level names, ensuring that players can see their best achievements.
LevelLayout.gd: Defines the layout of each level, handles the placement of tiles for various layer types such as floors, walls, and boxes. It utilizes vector mathematics to manage positions on the grid.
TileLayers.gd: Represents different layers of tiles, enabling organized management of various elements in the game environment. This includes categorization into floors, walls, boxes, and target boxes.
GameManager.gd: Orchestrates game flow, including scene transitions between the main menu and individual levels, and manages the loading of high score data.
LevelData.gd: Responsible for loading and interpreting level data from a JSON file, converting it into usable game layouts.
Skills Exemplified
This project showcases a variety of programming skills, including:
Game Design Principles: Understanding of how to design levels that provide both challenge and enjoyment.
Data Management: Utilizing dictionaries and JSON parsing for managing game state and level design.
Object-oriented Programming: Use of classes and GDScript extends to represent game objects logically, encapsulating behavior and data.
Game State Management: Handling transitions between menus and gameplay, including managing inputs and responses.
Debugging and Problem Solving: Implementing features to track high scores required algorithmic thinking to ensure accuracy and efficiency.
User Interface Interaction: Designing user interactions, such as scene transitions and input handling, that facilitate a seamless player experience.
Getting Started
To run Sokoban, clone the repository to your local machine and open it in the Godot Engine. Download any required dependencies if prompted, and you're ready to start pushing boxes to victory!
Feel free to contribute to the Sokoban repository by adding new levels, fixing bugs, or enhancing gameplay mechanics!
Creating README for: SpaceAce
SpaceAce
Overview
SpaceAce is an engaging 2D space shooter game developed using the Godot engine. Players navigate through waves of enemies, utilizing an array of power-ups and upgrades to enhance their gameplay experience. The objective revolves around scoring as high as possible while avoiding enemy attacks and defeating various forms of adversaries, including classic flying saucers and bombers.
This project showcases advanced techniques in game development, including object-oriented programming, signal management for event handling, and dynamic scene transitions. The game structure emphasizes modularity and scalability, making it a solid foundation for aspiring game developers.
Features
- Modular Enemy Waves: The game uses predefined enemy waves, allowing for diverse gameplay and increased difficulty as players progress.
- Power-ups: Collectible items that provide players with health boosts and shield strengthening, ensuring dynamic gameplay.
- Score Management: Tracks player performance in real-time with a system that updates scores and high scores effectively.
- Signal Management: Implements a custom signal hub for effective communication among game elements, facilitating interaction across the game's components.
- Efficient Game Loop: Handles user inputs seamlessly while managing enemy spawn timers and player interactions.
Key Classes and Components
- EnemyWave: A resource for defining enemy properties such as speed, gap, and number.
- GameManager: Central to managing scene transitions and input handling.
- WaveManager: Responsible for generating and managing the gameplay flow of enemy waves.
- Player: Contains movement mechanics, shooting logic, and collision effects with power-ups and projectiles.
- PowerUp: Facilitates the creation and management of various power-up types that enhance player capabilities.
- HealthBar: A visual representation of the player's health, with signaling for when a player dies.
Programming Skills Exemplified
- GDScript Programming: The code is written in GDScript, a dynamic language specifically designed for game development in Godot.
- Object-Oriented Design: The use of classes, inheritance, and modular design reflects efficient programming practices that enhance code reusability.
- Signal-Based Communication: Mastery of Godot's built-in signaling allows for effective decoupling of game components, simplifying event-driven programming.
- Scene Management: Handling scene changes and UI components demonstrates an understanding of state management within applications.
- Input Handling: Implements custom input actions and bindings to create a responsive gameplay experience.
Getting Started
To get started with SpaceAce:
Clone the Repository: Use the command below to clone the project to your local machine.
git clone https://github.com/yourusername/SpaceAce.git
Open in Godot: Launch the Godot editor and open the cloned project folder.
Run the Game: Set the main scene as
Main.tscnand run the project to start playing.
Conclusion
SpaceAce is not just a simple 2D game; it's a learning experience and a significant step towards mastering game development with Godot. This project encapsulates essential gameplay mechanics, efficient resource management, and advanced programming techniques, making it an exemplary resource for budding game developers.
Creating README for: TappyPlane
/var/folders/w8/vvd6_5257db0q26brk71hkh00000gn/T/ipykernel_59970/119643033.py:5: UserWarning:
user_prompt is 41150 characters...Prompt was truncated to MAX_CHARACTERS setting of 40000 characters.
  warnings.warn(warn_message, category=UserWarning)
TappyPlane
TappyPlane is a lightweight 2D side-scrolling game developed using the Godot engine. In this game, players control an airplane, navigating through various obstacles while collecting points. The game features engaging mechanics such as scoring, high scores, and scene transitions, presenting players with an entertaining flying challenge.
Features
- High Score Tracking: The game maintains a record of the highest score achieved, implementing a system to save and load scores.
- Scene Management: The game seamlessly transitions between multiple scenes: a main menu and the main gameplay screen.
- Obstacle Generation: Players navigate through an ever-increasing number of obstacles, which are dynamically spawned in the game environment.
- User Interface: A clean and intuitive UI displays scores and game status, enhancing the player experience.
- Audio Effects: Game sound effects enhance the gameplay experience, providing feedback on player actions.
Project Structure
The project is comprised of several key components:
Scripts: The game logic is encapsulated within various GDScript files, including:
GameManager.gd: Handles scene transitions and manages game workflow.ScoreManager.gd: Manages high score tracking and saving/loading functionality.SignalHub.gd: Centralized signal handling to communicate between game elements.- Various scripts defining behaviors for gameplay elements such as the airplane, pipes, and UI components.
Scenes: Organized in a hierarchical structure to facilitate efficient game state management. Key scenes include:
Main.tscn: The game's main menu.Game.tscn: The core gameplay scene featuring obstacles and player controls.Game_UI.tscn: UI elements for score display and player notifications.
Programming Skills Exemplified
This project showcases the following skills and programming concepts:
- Object-Oriented Programming (OOP): Utilizing classes, inheritance, and encapsulation through GDScript, promoting code reuse and organization.
- Signal and Slot Mechanism: Effective use of Godot's signal system to decouple components and facilitate communication between game objects.
- State Management: Managing game states via scene transitions and a game manager, demonstrating skills in flow control and game state logic.
- Resource Management: Loading and saving game data using Godot's resource system to track player progress.
- Event Handling: Implementing user input handling to control game interactions efficiently and responsively.
Installation and Setup
- Clone the repository using:
git clone https://github.com/YourUsername/TappyPlane.git
- Open the project in the Godot Engine.
- Set up the project configurations as needed.
- Run the main scene to start playing!
License
This project is licensed under the Creative Commons Attribution-NonCommercial 4.0 International License. You are free to share and adapt the material provided, as long as you give appropriate credit, provide a link to the license, and indicate if changes were made.
TappyPlane is an excellent project for both budding game developers and seasoned professionals looking to refine their skills in game design and development with Godot. Enjoy your flying adventure!
Creating README for: VixenVault
/var/folders/w8/vvd6_5257db0q26brk71hkh00000gn/T/ipykernel_59970/119643033.py:5: UserWarning:
user_prompt is 106271 characters...Prompt was truncated to MAX_CHARACTERS setting of 40000 characters.
  warnings.warn(warn_message, category=UserWarning)
Vixen Vault
Overview
Vixen Vault is a 2D action-adventure game built with the Godot Engine. The game showcases various mechanics commonly found in platformers, including enemy interactions, level transitions, scoring systems, and animated character behaviors. Players navigate through different levels, engage with enemies, and collect power-ups while aiming to achieve high scores.
Features
- Dynamic Scene Management: The game can load different levels and handle scene transitions smoothly.
- Scoring System: Players earn points by defeating enemies or collecting items, with a high score leaderboard to keep track of achievements.
- Animated Characters: Utilizing an animation tree structure, characters have smooth animations for actions such as attacking, moving, and dying.
- Signals and Events: The game employs a signal system for managing game state changes, such as player death or level completion, ensuring loose coupling between game components.
- Physics-Based Interaction: 2D physics are integrated to manage actions like jumping and collision responses effectively.
Programming Skills Exemplified
This project serves as a rich resource for developing and enhancing various programming skills within the context of game development, particularly using Godot. The following skills are exemplified through the project:
- GDScript Proficiency: Deep understanding of GDScript, the scripting language used in Godot, is essential for creating game logic, managing state, and building reusable classes.
- Object-Oriented Programming: The game uses classes and inheritance extensively (e.g.,
EnemyBase,Boss,Player), demonstrating principles of OOP such as encapsulation and polymorphism. - Event-Driven Programming: Through the signal system, developers can learn how to manage events and callbacks, which are vital for inter-component communication in games.
- Game Physics and Collision Detection: Skills in using the Godot physics engine with built-in nodes like
RigidBody2DandArea2Dare critical for managing game interactions. - Animation Management: Knowledge of creating and managing animations using
AnimationTreeandAnimationPlayerhelps in enhancing the visual appeal of games. - Resource Management: The project illustrates the effective loading, saving, and management of game resources, such as scores and settings, highlighting best practices in resource handling in game development.
- UI Design & Interaction: Basic skills in designing user interfaces and handling input methods, which are crucial for creating an engaging player experience.
Getting Started
To get started with Vixen Vault, you'll need to have Godot Engine installed on your machine. Follow these steps to run the project:
Clone the repository:
git clone <repository-url>
Open the project in Godot Engine.
Configure any necessary settings in the
project.godotfile if needed.Run the main scene to start gameplay.
Feel free to explore the scripts and assets to see how various game mechanics are implemented, and make improvements or add features as you like!
Contributing
Contributions to Vixen Vault are welcome! If you have ideas for new features, improvements in coding practices, or enhancements in game mechanics, please open a pull request or raise an issue.
Whether you are learning game development or are an experienced developer looking to explore Godot, Vixen Vault offers a comprehensive framework to build upon and learn from. Enjoy developing!
Creating README for: WarehouseWreckage
/var/folders/w8/vvd6_5257db0q26brk71hkh00000gn/T/ipykernel_59970/307256082.py:19: UserWarning:
Unable to decode: Main.umap! Skipping this file.
  warnings.warn(warn_message, category=UserWarning)
/var/folders/w8/vvd6_5257db0q26brk71hkh00000gn/T/ipykernel_59970/307256082.py:19: UserWarning:
Unable to decode: BP_Barrel01.uasset! Skipping this file.
  warnings.warn(warn_message, category=UserWarning)
/var/folders/w8/vvd6_5257db0q26brk71hkh00000gn/T/ipykernel_59970/307256082.py:19: UserWarning:
Unable to decode: BP_Barrel03.uasset! Skipping this file.
  warnings.warn(warn_message, category=UserWarning)
/var/folders/w8/vvd6_5257db0q26brk71hkh00000gn/T/ipykernel_59970/307256082.py:19: UserWarning:
Unable to decode: BP_Projectile.uasset! Skipping this file.
  warnings.warn(warn_message, category=UserWarning)
/var/folders/w8/vvd6_5257db0q26brk71hkh00000gn/T/ipykernel_59970/307256082.py:19: UserWarning:
Unable to decode: W_HUD.uasset! Skipping this file.
  warnings.warn(warn_message, category=UserWarning)
/var/folders/w8/vvd6_5257db0q26brk71hkh00000gn/T/ipykernel_59970/119643033.py:5: UserWarning:
user_prompt is 68523 characters...Prompt was truncated to MAX_CHARACTERS setting of 40000 characters.
  warnings.warn(warn_message, category=UserWarning)
WarehouseWreckage
WarehouseWreckage is a project focused on creating realistic warehouse environments using Unreal Engine 5.6, leveraging advanced rendering techniques and tools to enhance visual fidelity.
Project Description
This repository contains the necessary configuration and settings files for deploying a warehouse scene designed in Unreal Engine. It utilizes various lighting profiles and post-processing settings for achieving a dynamic and visually appealing environment. The project incorporates the Modeling Tools Editor Mode plugin which allows for comprehensive editing and modeling capabilities integral to the creation of complex scenes.
Key Features
- Scene Profiles: The project showcases multiple shared profiles for different lighting scenarios, including collaborations with advanced post-processing techniques.
- Custom Lighting: It allows for adjustments to ambient light, directional lighting, and sky lighting to create immersive atmospheres.
- Post-Processing Effects: The configuration includes parameters for color grading, bloom effects, and depth of field to enhance visual storytelling.
Skills Demonstrated
This project serves as an exemplar of several programming and development skills, primarily focused within the realm of game development, particularly:
- Unreal Engine Proficiency: Understanding of setting up and configuring projects, utilizing plugins, and creating realistic environments within the Unreal Engine.
- Shader and Post-Processing Knowledge: Experience with lighting and visual effects, showcasing an ability to enhance graphics quality and atmosphere.
- Configuration Management: Ability to manage and edit ini files for ideal performance tuning and optimization.
- Environment Design: Knowledge in creating immersive 3D environments that utilize advanced graphic features.
Getting Started
To get started with the WarehouseWreckage project:
- Clone the repository to your local machine.
- Open the project in Unreal Engine 5.6.
- Navigate to the scene settings to explore different lighting profiles and make necessary modifications.
Feel free to contribute to the project by suggesting new features or reporting issues!